ECM Integration
To Use ECM
To use ECM, you need to configure the initial settings as follows:
- Install ECM on the PC, and then make the necessary settings on
each PC.
For details on installing ECM, refer to the ECM documentation and ECM online Help.
- Install OpenLab Shared Services.
For details on installing and configuring OpenLab Shared Services, refer to the instruction manual for the "User Access Control Pack".
- Perform user creation, permission installation, role settings,
and so on.
For details on this procedure, refer to the instruction manual for the "User Access Control Pack".
- In the [Configure
User Access Control] dialog box in the User Access Control
Pack, enable ECM and configure the connection settings.
For details on this procedure, refer to the instruction manual for the "User Access Control Pack".
MassHunter operates differently when the protect mode is on (default) and when it is off.
For restrictions on features when using Database Integration, refer to “Restrictions on features when using Database Integration”.
When the protect mode is on (default):
You do not need to download to check the batch results. You can review batches in the ECM directly.
Follow the steps below to check the batch results
- Click [Open Batch Result] from the [Batch] group in the [Home]
tab on the [ICP-MSICP-QQQ
Data Analysis] window.
The [ECM Desktop Open] dialog box is displayed.
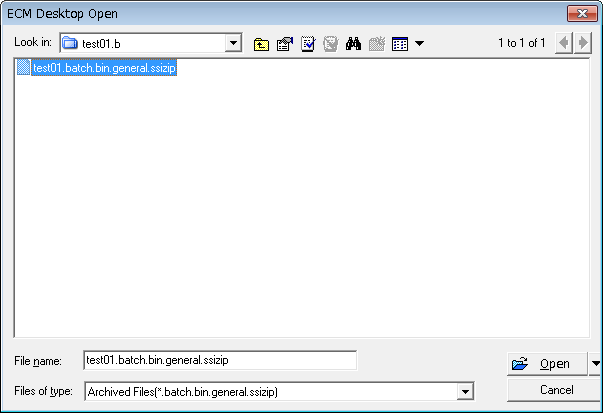
- Select the batch you want to check, and then click [Open.]
The batch results are displayed in the [Data Analysis] window.
The dialog box for direct manipulation of the ECM database is displayed when you open or save various type of files other than the above.
If you cannot open a batch due to an error
This function is used for specific troubleshooting.
If there is inconsistency between the data on the database and the data on the hard disk for any reason, an error indicating that tampering was found in the batch is displayed, and the batch may not be opened. In this situation, you can use this function to correct inconsistencies and open the batch.
Follow the steps below to re-upload the fixed local batch.
- Click [Start] on the Windows taskbar, and then select [ICP-MS MassHunter
Workstation] > [Configure User Access Control].
The [Login] dialog box is displayed.
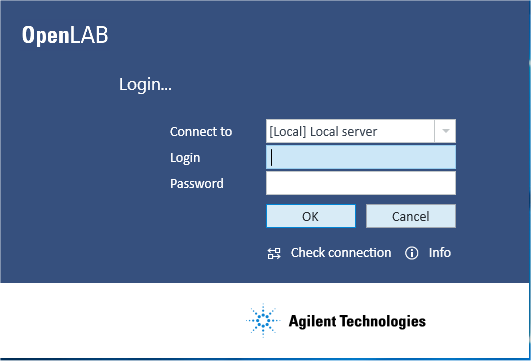
Login dialog box
- Enter a user ID that has "ICPMHAdmin" access rights to
ECM and a password, and then click [OK].
The [Configure User Access Control] dialog box is displayed.
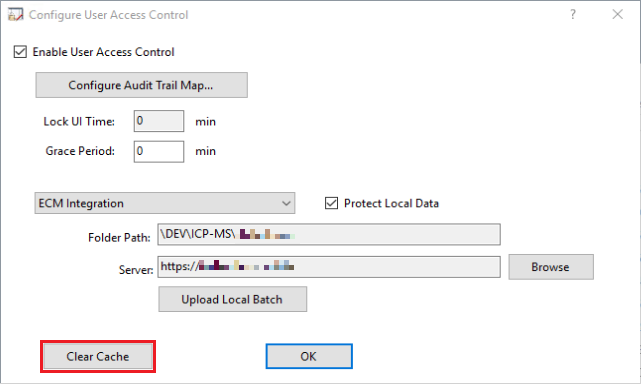
Configure User Access Control dialog box
- Click [Upload Local Batch].
If the current Access Control setting differs from the previous setting, a confirmation message is displayed. To apply the current setting to MassHunter, click [OK] in the message window, and then click [OK] in the [Configure User Access Control] dialog box. Next, perform steps 1 to 3 again.
The [Login] dialog box is displayed.
- Enter a user ID that has "ICPMHAdmin" access rights to
ECM and a password, and then click [OK].
The [OpenLab ECM Login] dialog box is displayed.
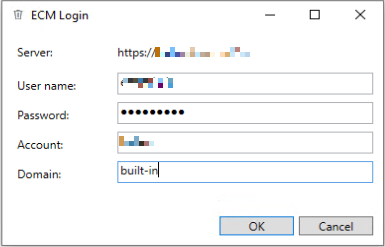
OpenLab ECM Login dialog box
- Login to ECM.
The [Select Batch] dialog box is displayed.
Select the batches to be re-uploaded, and then click [OK].
You can only upload up to 300 batches at one time.
- Click [Yes] when the confirmation message is displayed.
Uploading starts.
When uploading is complete, the uploading results are displayed in the [Result] dialog box.
You can also check these in the ICP-MS MassHunter log from the Windows Event View
When Protect Mode is off:
To review the batches in ECM, you need to download the batches to your local PC before you can review them.
To download batches from ECM, follow the steps below.
- Click [Start] on the Windows taskbar, and then select [ICP-MS MassHunter
Workstation] > [ICP-MS MassHunter Database Utility].
The ICP-MS Database Utility dialog box appears.
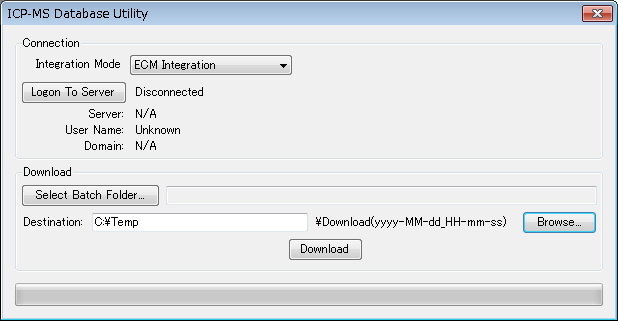
- Select [ECM Integration] from the [Integration Mode] dropdown menu.
- Click [Logon To Server].
The dialog box for specifying the server, user ID and password appears.
- Enter the database server, user ID and password in this dialog
box, and then click [OK].
A connection to the server is established.
- Click [Select Batch Folder].
The dialog box for selecting a batch folder in ECM appears.
- Select a batch folder, and then click [OK].
- Click [Browse] to specify the folder where the selected batch will
be restored.
The dialog box for specifying the folder appears.
- Specify the folder in this dialog box, and then click [OK].
The batch is restored using the following naming structure.
[Specified path]\Download(yyy-MM-dd_HH-mm-ss) - Click Download.
The specified batch is downloaded from ECM and restored in the specified folder.
Do not rename batches when ECM Integration is in use.
In case ECM integration is in use, the Database Utility supports downloading from the L/C/D/F layer in which MassHunter originally uploaded the batch. But the Database Utility cannot handle a re-named batch even if it has been uploaded from MassHunter.
Reviewing downloaded batches
To review downloaded batches, follow the steps below.
- Click [Start] on the Windows taskbar, and then select [ICP-MS MassHunter
Workstation] > [Offline Data Analysis].
The Offline Data Analysis window appears.
- Select [Display Acquisition Method of sample data] or [Display
Instrument Configuration of sample data] from the [Display Report
for Data] group on the [Tools] tab.
The dialog box for selecting the downloaded batch in ECM appears.
- Select the downloaded batch in this dialog box, and then click
[OK].
A PDF file of the acquisition method or instrument configuration for the selected batch is displayed and can be printed.
If the data analysis is using online analysis and data acquisition is being performed, these two menu items are grayed out.