Setting up the SPS 4
To set up the SPS 4 autosampler:
- Install the SPS4 autosampler as described in the “Agilent SPS 4 User’s Guide”.
- Launch MassHunter, click [Sample Introduction] in the Dashboard
Pane, and then select Properties from the context menu that is
displayed.
Sample Introduction from the [Settings] dialog box is displayed.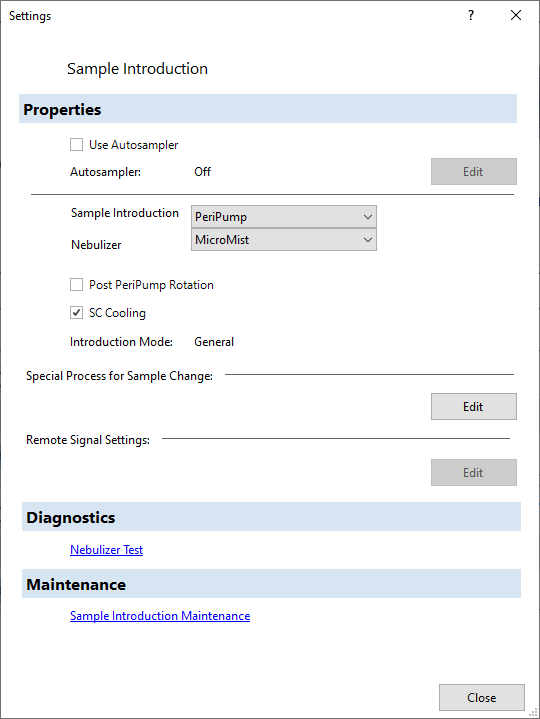
- Select [Use Autosampler], and then click [Edit] under Properties.
The [Configure Autosampler] dialog box is displayed.
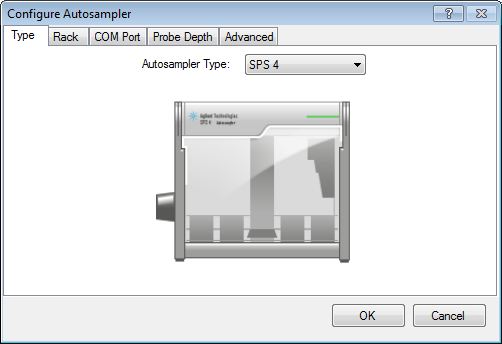
- Click the [Type] tab, and then select [SPS 4] from the [Autosampler
Type] list box.
- Click the [Rack] tab, select the Standard Rack (5/34), and then
select the rack that will be used from the [Autosampler Rack] list
box.
If your SPS 4 autosampler has a dual port wash reservoir, turn on [Dual Port Rinse]. If 96-well microtiter plates are configured, turn on [Wellplate]. You can use Rack 1 to Rack 8 by turning on [Wellplate]. However, the rack type is set to “96” and cannot be changed.
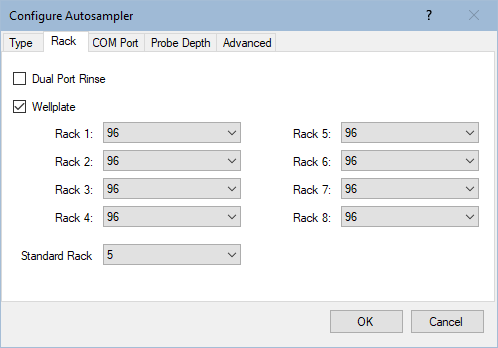
If the Autosampler Rack is not configured correctly, the SPS 4 Autosampler needle doe snot move to the correct position.
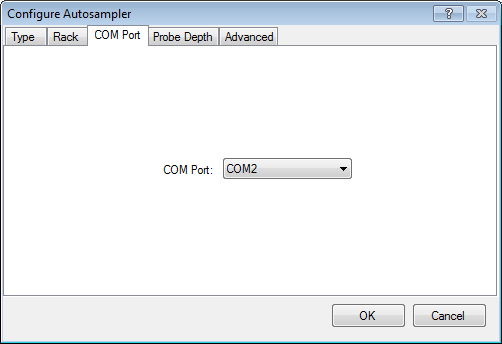
- Click the [COM Port] tab, and then select the COM port number for
the autosampler.
You should normally select the highest port number from the COM port setting. (For example: if COM 1 to COM 3 are available, usually use COM 3.)
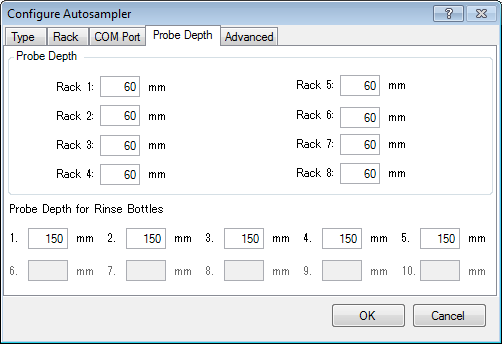
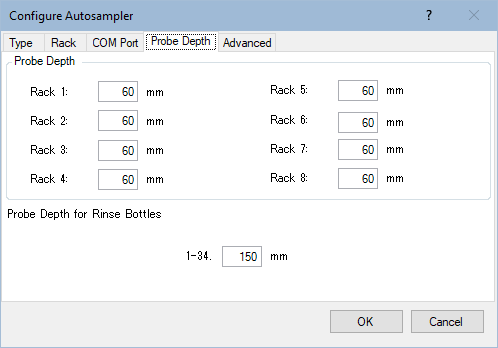
- Click the [Probe Depth] tab, and then set the appropriate probe
depth.
- For 5 vial Standard Rack
- For 34 vial Standard Rack
- For 5 vial Standard Rack
- Click the [Advanced] tab to set the velocities of the probe arm
movement or wash pump speed.
To set the horizontal, theta, and up/downward velocities for the probe arm steppers or wash pump speed, click the corresponding field, and then select one from the displayed list.
To reset them to the default speed values, click [Reset to Default]. If you skip the setting on this tab page, the default values are used.
- Click [OK].
- Click [Close] to close the [Settings] dialog box.