Setting up the SPS 4 Maintenance Position
Follow the steps below to set up the maintenance position for exchanging the sample probe:
- Launch MassHunter, click [Sample Introduction] in the Dashboard
Pane, and then select Properties from the context menu that is
displayed.
Sample Introduction from the [Settings] dialog box is displayed.
- Click [SPS 4 Maintenance Mode] from Maintenance.
This item is only displayed when SPS 4 is selected as the [Sample Introduction] and [Use Autosampler] is selected.
The [Maintenance] dialog box is displayed.
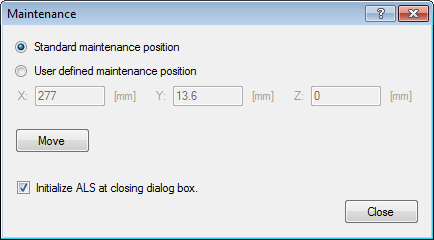
- Select one of the following positions:
- Standard maintenance position
Select this item to set the maintenance position to the bottle-5 position on the 5 wall standards rack (Z-axis position is 0 mm).
- User defined maintenance position
Select this item to set the maintenance position specified by the X/Y/Z-axes values.
- Standard maintenance position
- Click [Move] to move the sample probe to the specified position.
At this time, you can exchange the sample probe from the position.
- Click [Close] to close this dialog box.
If you need to initialize SPS 4 after replacing the sample probe, select [Initialize Autosampler at closing dialog box], and then click [Close].