Creating a Batch Template using Method Wizard
The simplest way to create a method and batch for future use that is tailored to your hardware configuration and analytical requirements is to use the Method Wizard. The Method Wizard knows your hardware configuration and your instrument’s capabilities. It can automatically provide most of the detailed configuration settings for a well optimized method based on some simple input from the user.
- Open the [Settings]
dialog box in the [ICP-MSICP-QQQ
MassHunter] window to check that your hardware, including your
autosampler, is correctly configured. Click
 at the side of [Hardware] to review and update your hardware settings
as needed.
at the side of [Hardware] to review and update your hardware settings
as needed. - Click [New] from the [Batch] group on the [Home] tab.
- Click the [Method Wizard] radio button, enter a name for your new
batch, and then click the [Create] button. A screen is displayed that
describes what the Method Wizard is used for and your current System
Configuration.
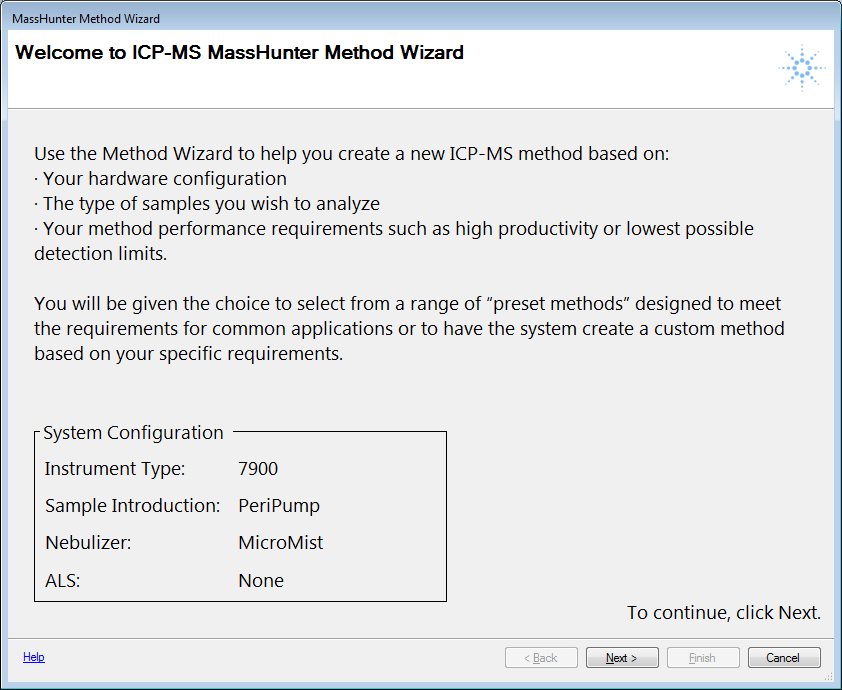
- Click [Next >].
- Select the analysis mode appropriate to your samples and application.
If you have not purchased the optional Nanoparticle Application Module, the Analysis Mode screen is not displayed.
In most cases, you will select “Spectrum/TRA” as the acquisition mode.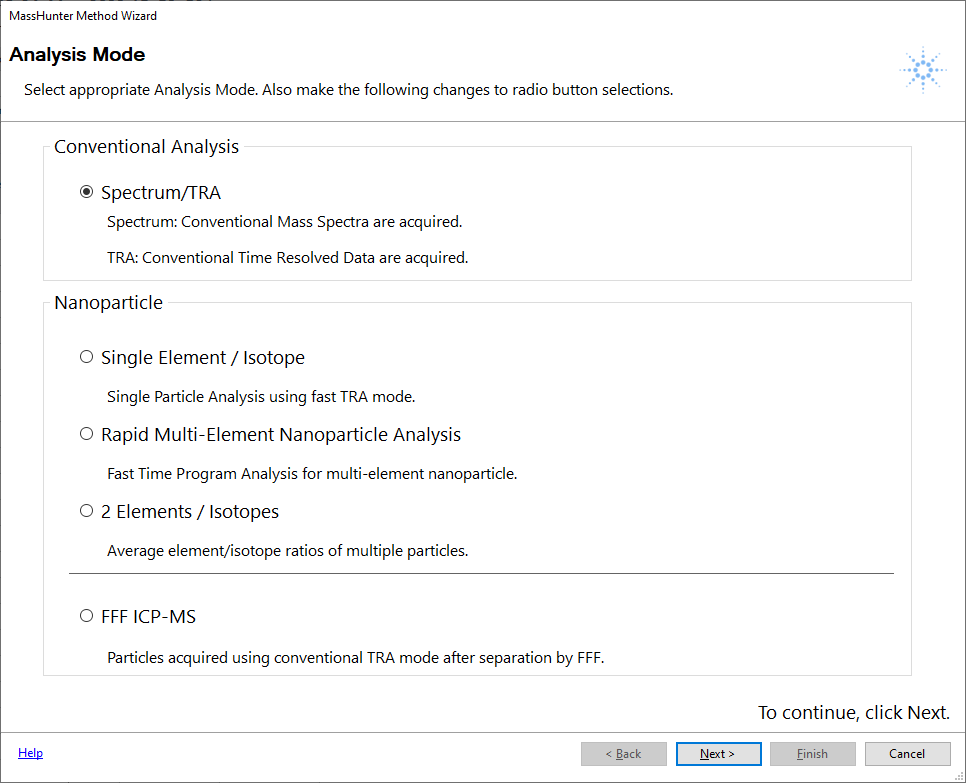
- Click [Next >].
The Method Wizard Mode screen is displayed.
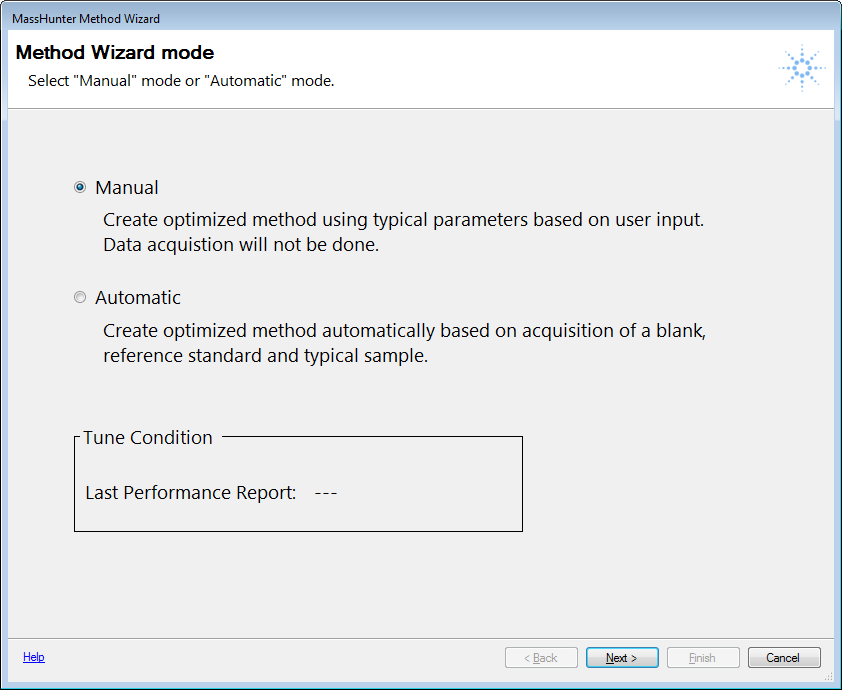
There are two method creation modes available in Method Wizard.
A manual, interactive mode, and a fully automatic mode. For the purposes of this guide, Manual Mode will be used.Automatic mode is very powerful, but does not support all hardware mainframes or options and is more limited than Manual Mode in the types of samples it can analyze.
- Select “Manual”, and then click [Next >].
The Plasma Robustness selection screen is displayed. This screen guides the optimization of plasma conditions based on sample total dissolved solids to gain the best combination of sensitivity with long term stability and low interference. Examples of typical samples for each of the three robustness modes are provided. Select the mode that most closely matches the TDS of your samples.
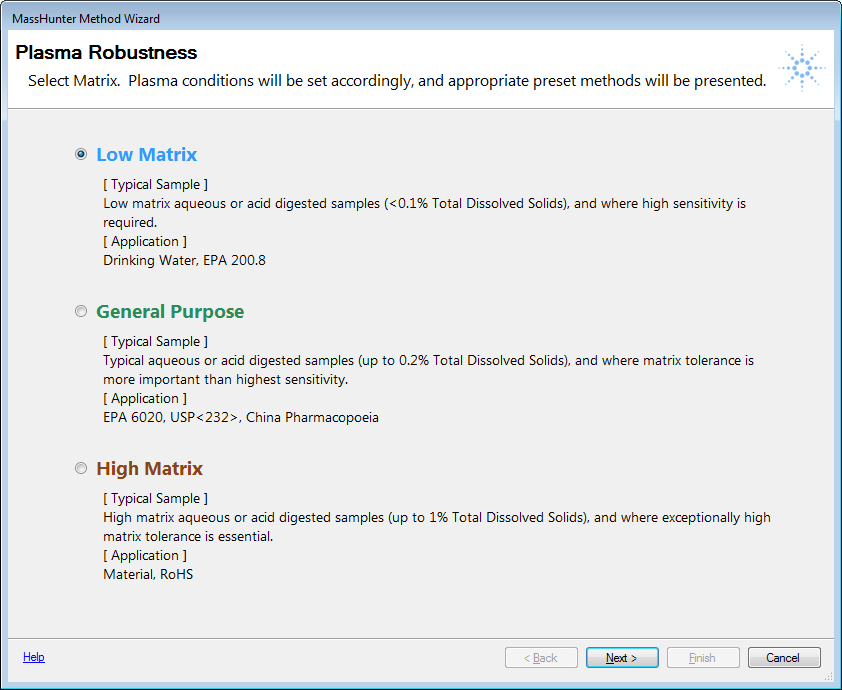
- Click [Next >].
The Preset Method screen is displayed. ICP-MS MassHunter comes with a large number of pre-configured methods designed to work for common, well defined and regulated methods. The available preset methods that match both your instrument configuration and your selected sample matrix type are available in the Preset Method pull-down list. The system does not allow you to select a preset method that is not matched to your hardware or your specified analytical requirements.
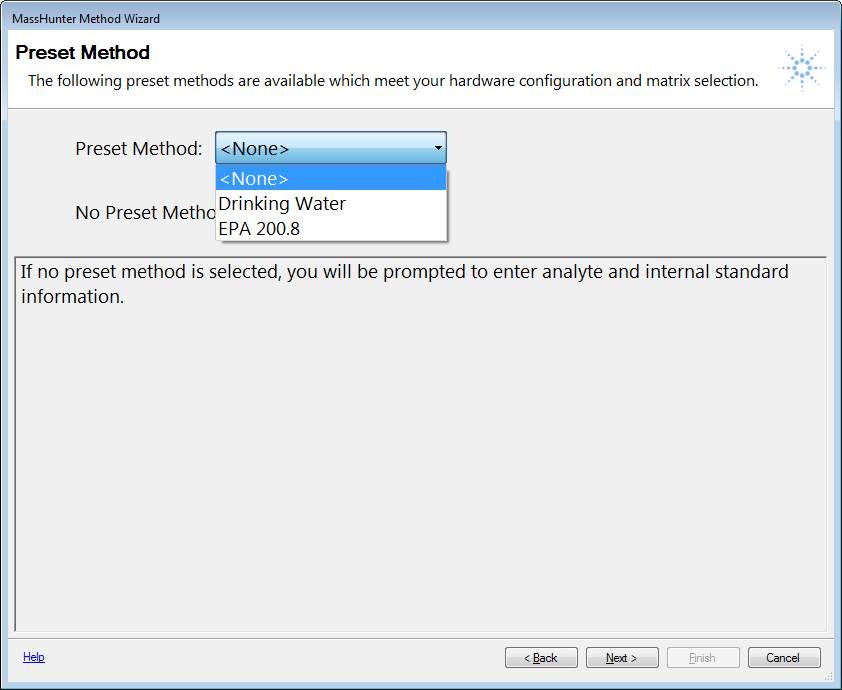
- Click the listed Preset Method that matches your requirements.
If none of them match, leave <None> as the selected Preset Method.
- Click [Next>].
The use of internal standards is highly recommended in ICP-MS analysis and required by most regulated methods. The most commonly used internal standard elements are included in one of two Agilent Internal Standard Stock solutions at useful concentrations. If you want to use one of the Agilent ISTD mixes, select the Agilent product number from the pull down list box. Alternatively, leave <None> as the selection, and you can specify your internal standard elements manually later.
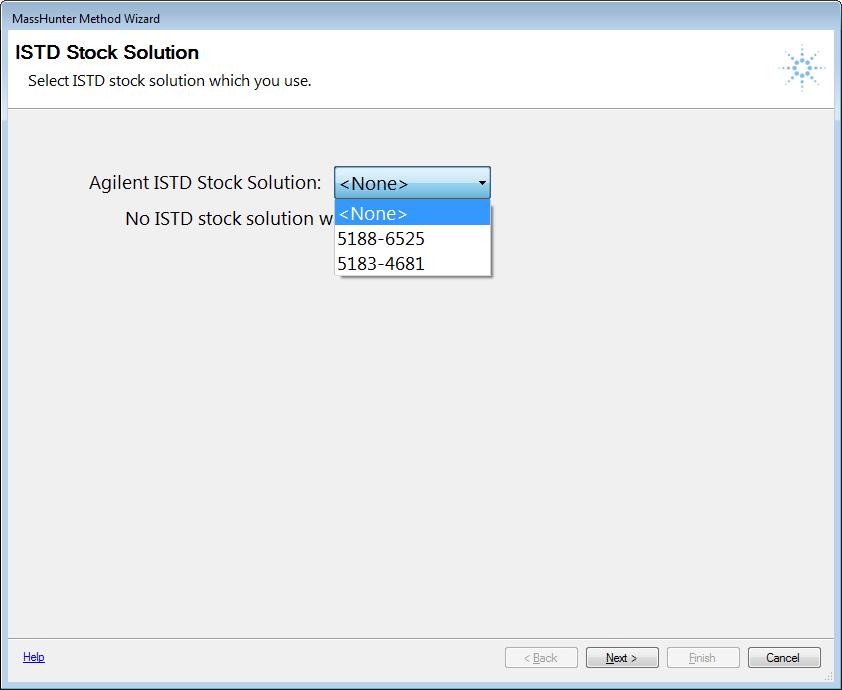
If you selected one of the ISTD stock solutions, the contents are displayed on the next screen as shown in the following example.
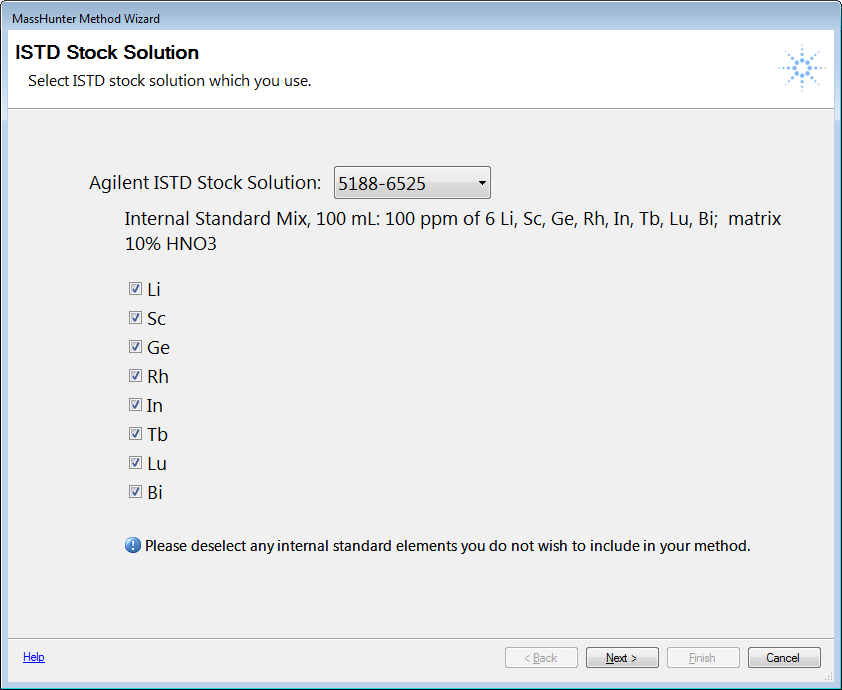
Select the individual elements from the list that you want to include in your method.
- Click [Next>].
The Element List screen is displayed. As with the preset methods, several lists of elements specified in common or regulated methods are available from the pull-down Element List box. When you select one of these Element Lists, those elements and appropriate isotopes are automatically added to your method.

- Click [Next>].
In this example, <None> was selected as the Element List. The screen displayed shows the periodic table and a list of the previously selected Internal Standard elements which are designated as ISTD and highlighted on the periodic table. Select the analyte elements you want to use from the periodic table. In this example, three analyte elements have been added to the provided list of internal standards by clicking on Ni, Cu and Zn.
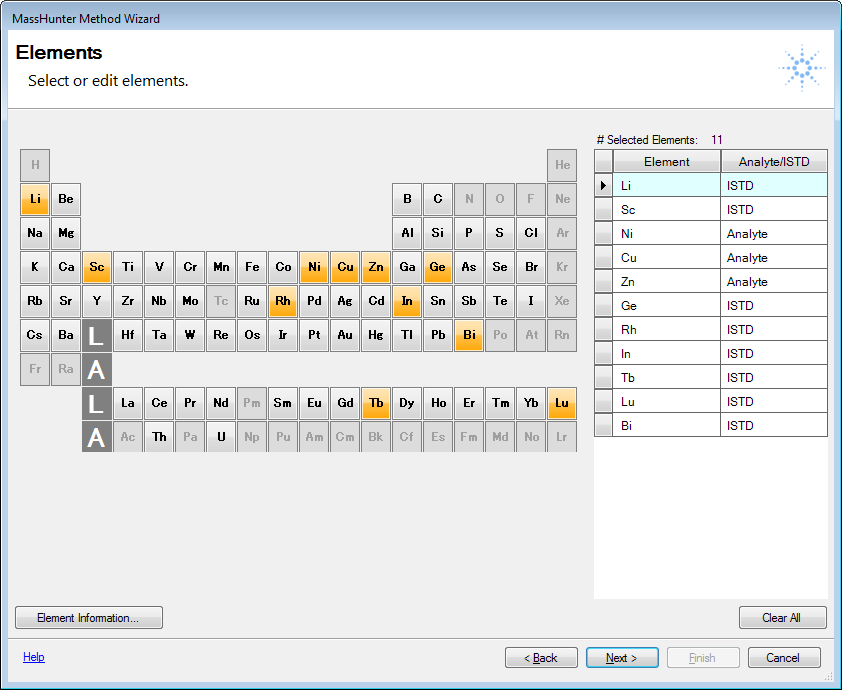
- Continue selecting the analyte elements you want to use until they are all highlighted and included in the list on the right. If you make a mistake, you can remove an element by simply clicking it again. When you are finished, click [Next>].
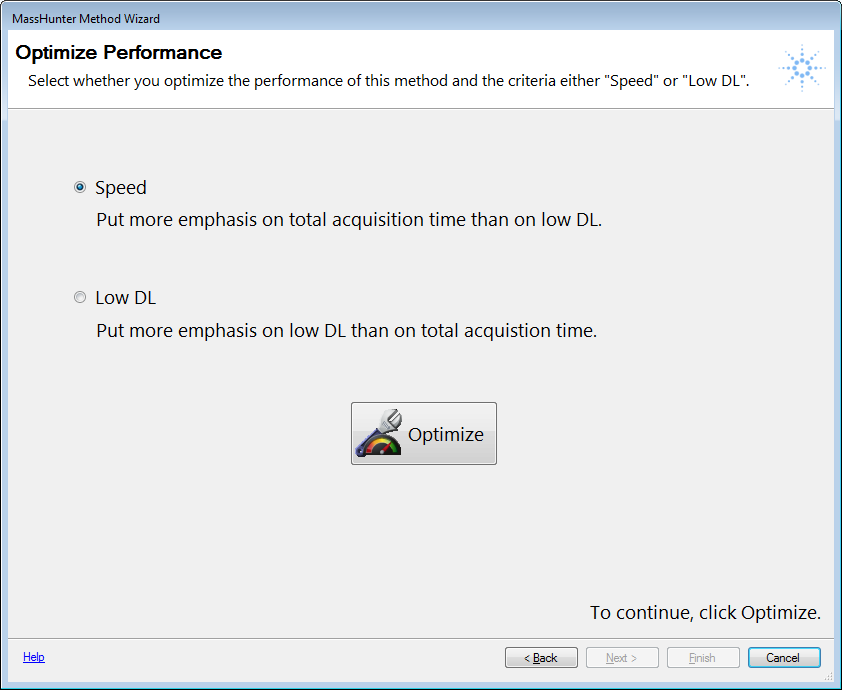
- The Optimize Performance screen is displayed. This screen is to
help you decide which isotopes, tune modes, integration times and
other parameters should be set for each element to achieve either
the best possible throughput (fastest analysis), or lowest possible
detection limits. Your hardware configuration is considered in these
optimization steps. Select either Speed or Low DL, and then click
the [Optimize] button.
- The system takes a few seconds to build the optimized method to
your specifications. You are then prompted to click [Finish] to close
the Method Wizard.
At that point, you are presented with your newly created Method and Batch to review and edit as needed.
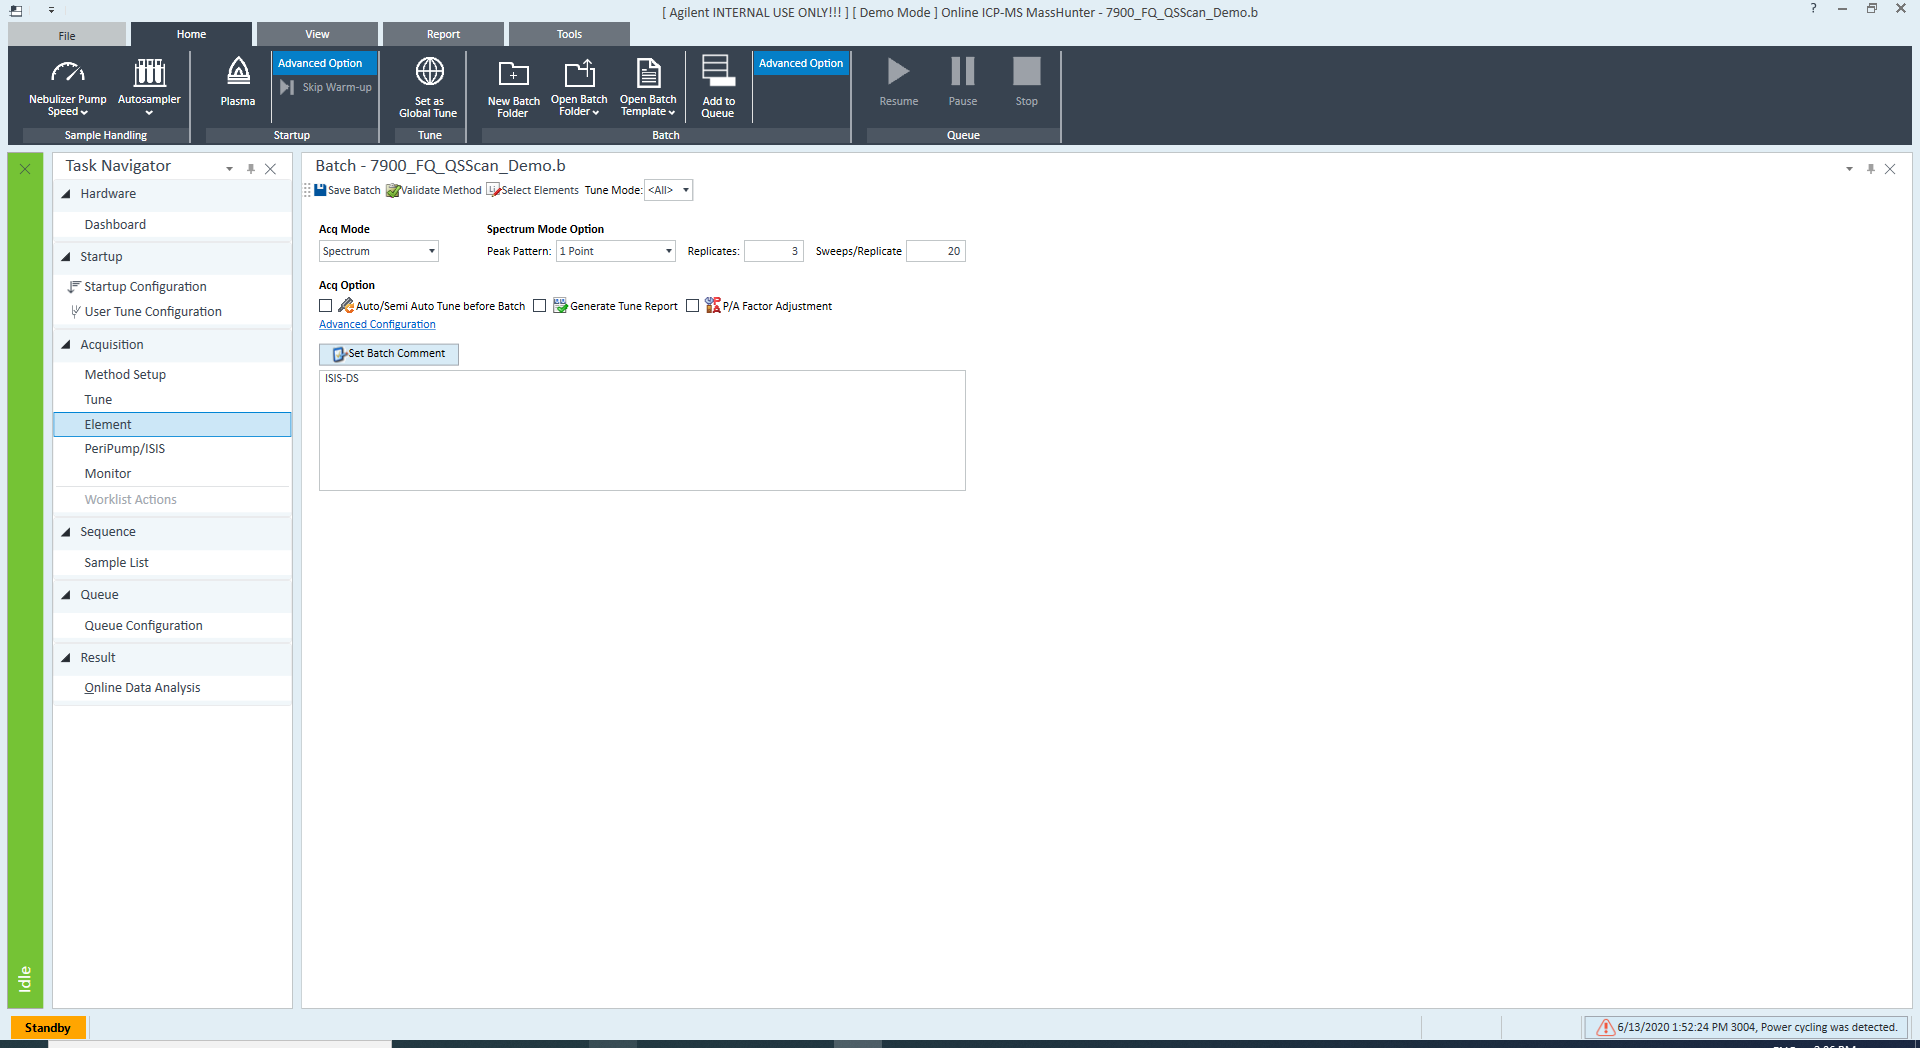
It is recommended that you open the Sample Introduction Pane and make sure that the sample uptake, stabilization, and rinse settings meet your needs. They were preconfigured based on standard configurations, but can almost certainly be optimized to your needs. The other panes should be opened and reviewed as well, but are probably usable as they are. The only remaining task is to add your samples to the batch before running it.
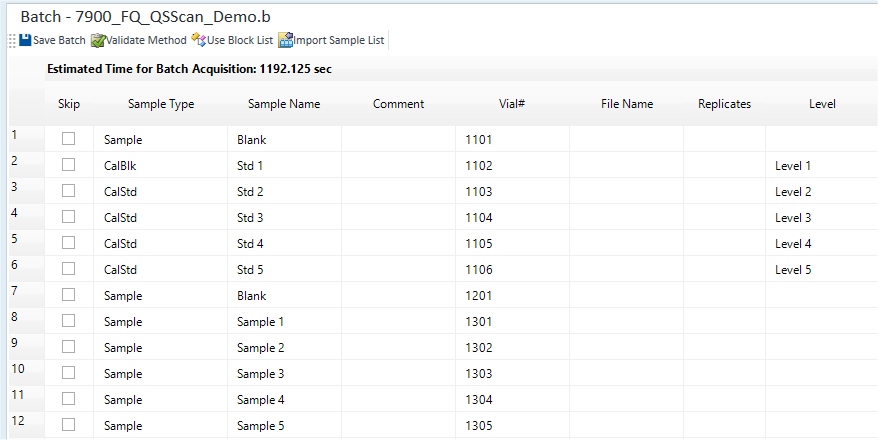
- Open the Sample
List Pane (Sequence) and fill in your list of calibration standards,
blanks, QC checks if any, and samples.
- Click [Save Batch] on the [File] tab.
- At this point, if the plasma is on and the instrument is tuned,
you can run the batch by clicking [Add to Queue] from the [Batch]
group on the [Home] tab.
However, it may be more useful to save this batch for future use by saving it as a Template. In this way, it can be used repeatedly and you only need to update the sample list.
- To save as a batch template, click [Save As Batch Template] on the [File] tab, enter a name for your Batch Template, and then click [Save].
- Your Batch Template is displayed in the list of three Batch Templates in [Create From Template] from the [Batch] group pull-down menu on the [Home] tab for easy access the next time you need it.