Starting the Instrument
This section explains how to start the instrument from the following three states:
For important information and precautions on the handling and use of compressed gases (including oxygen, hydrogen and ammonia) refer to the Hardware Maintenance Manual, Ammonia Safety Guide, Hydrogen Safety Guide and Site Preparation Guide.
Starting the Instrument from Cold
Use the following procedure to start up the instrument after it has been unplugged for a move, maintenance, or a long-term shutdown.
- Make sure that the instrument is plugged in.
Plug the instrument into a power receptacle.
Make sure that the hoses and power cables of the foreline pumps, the Ar gas hose, the computer LAN cable to this instrument, and the water hoses are properly connected.
- Turn on the power to the foreline pump.
Always check this switch before you start the vacuum of the instrument. When the switches are in the on position, the pumps can be turned on from the MassHunter Workstation. The pumps remain off until the vacuum is turned on by the MassHunter Workstation software.
Turn on the main power breaker and the pump switch(es) on this instrument.
These three switches are located on the rear side.

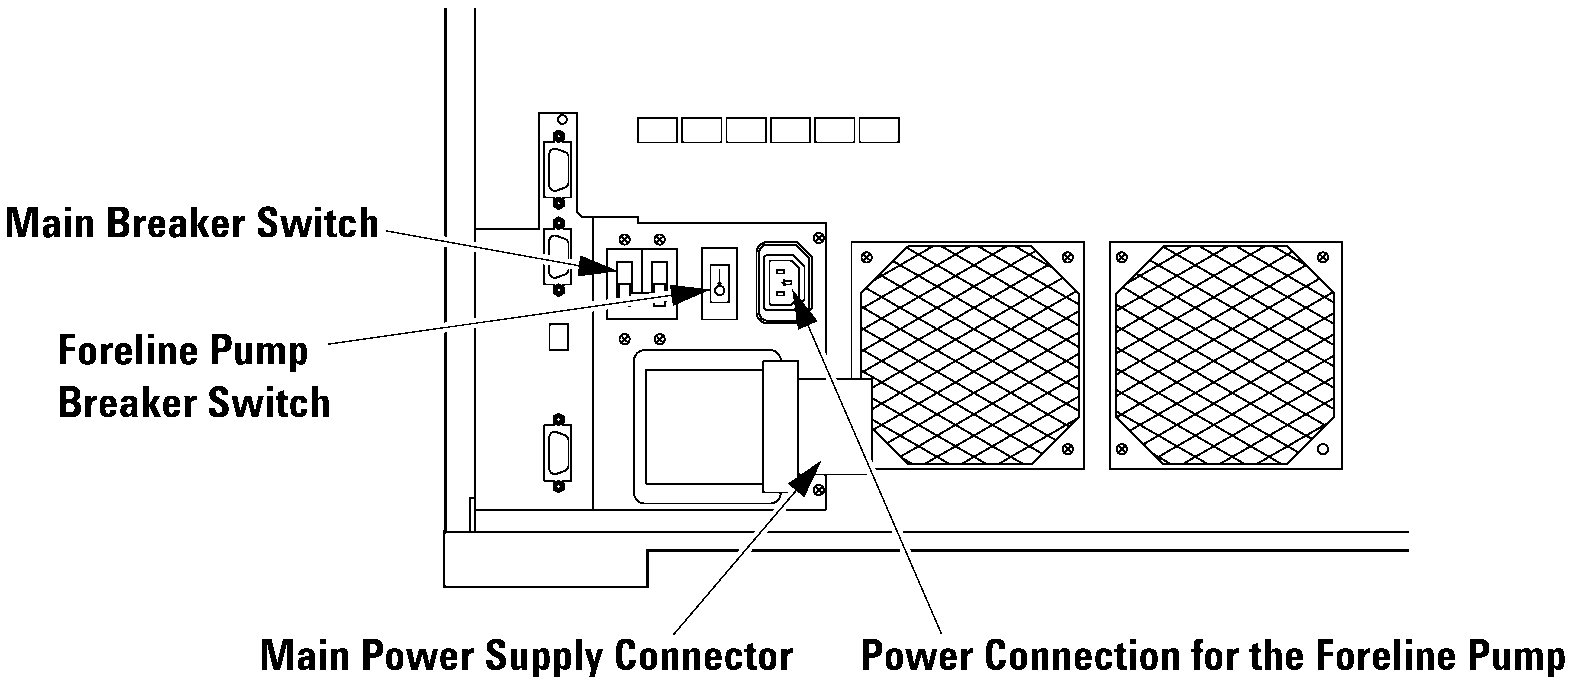
Rear View and Control Switches
Turn on the instrument power switch that is located on the front panel. The instrument now has power. The green light on the power switch is on.
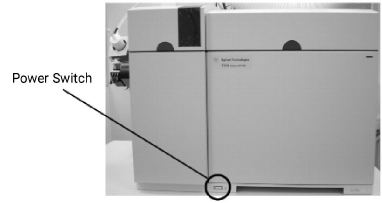
Front View
- Start the computer.
- Start the MassHunter Workstation software.
The [ICP-MSICP-QQQ MassHunter] window appears.
In Shutdown mode, "Shutdown" is displayed in the Status Bar and the indicator in the [Status Viewer] dialog box and Instrument Status Pane is grayed out. Also, the LED at the top-right corner of the instrument is off.
You can now proceed to "Starting from Shutdown Mode" and "Starting from Standby Mode".
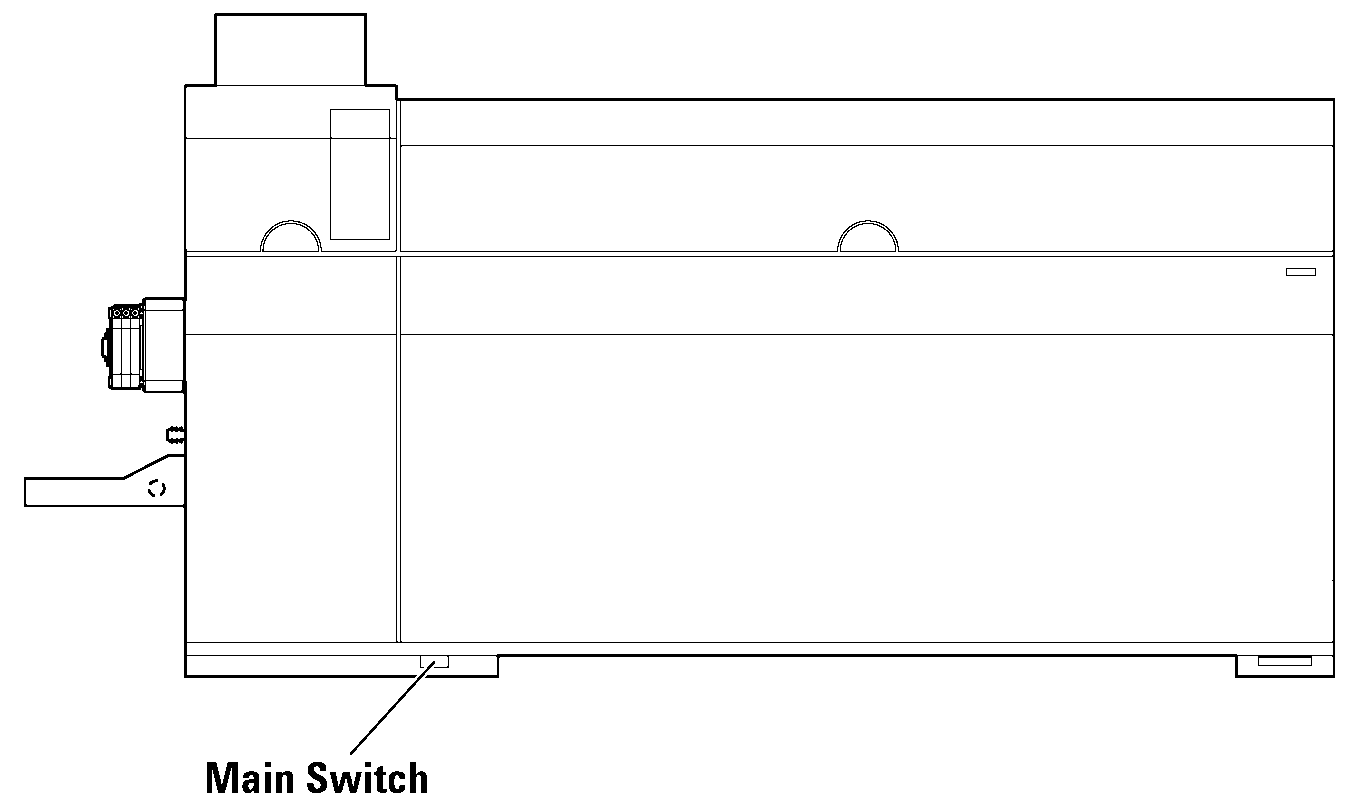
If you start MassHunter Workstation before you turn on the main power of the instrument, then communication cannot be established, and the instrument cannot be controlled from MassHunter Workstation.
In that case, turn on the main switch of the instrument. Confirm that the red light is off on the status indictor, then start MassHunter Workstation.
For information about starting MassHunter Workstation, refer to "Starting the Software".
Starting from Shutdown Mode
This section explains how to start the instrument from Shutdown mode.
- Click [Dashboard] from the [Hardware] group in the Task
Navigator.
The Dashboard Pane is displayed.
- Click [Vacuum] in the [Mainframe].
A confirmation dialog box appears.
- Click [Yes].
The instrument turns on the foreline pump, opens the backing line valve, and turns on the turbo pump.
The vacuum chamber reaches its correct pressure of 5 x 10⁻⁴ Pa and the instrument is in Standby mode.
The process takes longer when the vacuum chamber has been open to the atmosphere for any length of time.
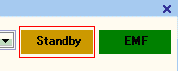
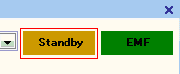
In Standby mode, "Standby" is displayed in the Status Bar and the indicator in the [Status Viewer] dialog box and Instrument Status Pane. Also, the LED at the top-right corner of the instrument turns orange. (A flashing orange LED indicates that the mode is changing).
You can now proceed to "Starting from Standby Mode".
Starting from Standby Mode
This section describes how to start the instrument from Standby mode.
The plasma is off when the instrument is in Standby mode. After the plasma is ignited, the instrument is in Analysis Mode. To start the instrument from Standby mode, complete the following steps:
- Make sure that the instrument is in Standby mode.
In Standby mode, "Standby" is displayed in the Status Bar and the indicator in the [Status Viewer] dialog box and Instrument Status Pane in the [ICP-MSICP-QQQ MassHunter] window.
- Close the hoods.
Close both the hoods tightly. The safety function is tripped if either hood is open. The plasma will not ignite and go to the Analysis Mode if the covers are open.
- Make sure that the exhaust duct is working properly.
- Supply the instrument with cooling water and argon gas.
The cooling water chiller must be turned on.
The source pressure of the argon gas should be 500 to 700 kPa.
- Make sure that the drain vessel has sufficient empty space.
Make sure that all peristaltic pump (peripump) tubes are in good condition and correctly clamped into the peristaltic pumps.
- Click [Plasma] from the [Startup] group on the [Home] tab.
A confirmation dialog box appears.
- Click [Yes].
The gases for the plasma torch are switched on and the gas lines are purged. The plasma ignites and the interface foreline pump starts to evacuate the interface vacuum chamber.
Make sure that the instrument is in Analysis Mode.
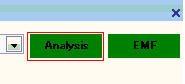
When the instrument is in Analysis Mode, "Analysis" is displayed in the Status Bar and the indicator in the [Status Viewer] dialog box and Instrument Status Pane.
Be sure to clamp the peripump tubing for the drain in the peripump. The drain from the spray chamber is provided by this peripump. If the spray chamber is not drained properly, it fills with solution. This causes solution to flow to the torch and the plasma turns off.