Autodilution Acquisition using ADS 2
This section explains the procedure for performing autodilution acquisition using ADS 2.
Preparation before Acquisition
Complete ADS 2 wiring and piping.
Prepare rinse solution, diluent, 10 ppb of tuning solution, and ISTD solution (if used).
Add the tuning and ISTD solutions to be introduced through the AVS tune/ISTD valve.
To install ADS 2, refer to the User’s Guide and video below.
Agilent Advanced Dilution System ADS 2 User’s Guide
ADS 2 settings
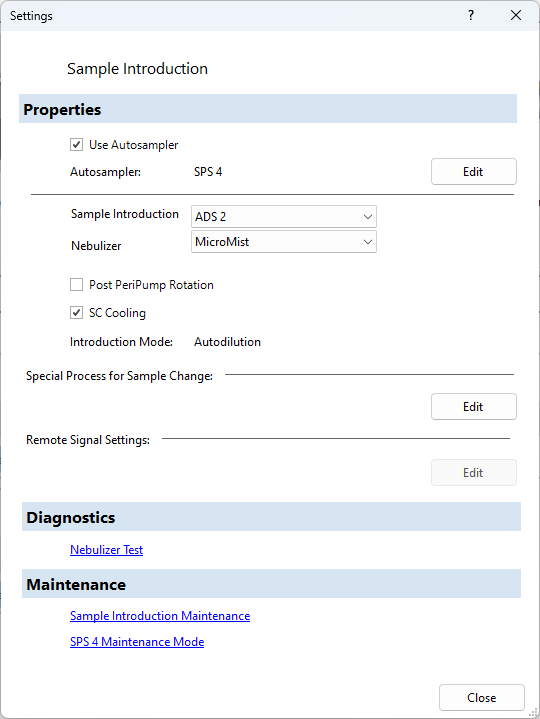
From the Task Navigator, click [Dashboard].
The Dashboard pane is displayed.Click [Properties] from the context menu of [Sample introduction] and select [ADS 2] as the [Sample Introduction].
When connecting the ADS 2 and ICP-MS for the first time, initialize the ADS 2 once and flush the syringe six times. Proceed as follows:
From the context menu of [ADS 2] on the Dashboard pane, click [Initialize].

When initialization is complete, click [Flush] from the [ADS 2] context menu.
Enter "6" in the [Set number of flushing] dialog box and click [OK].
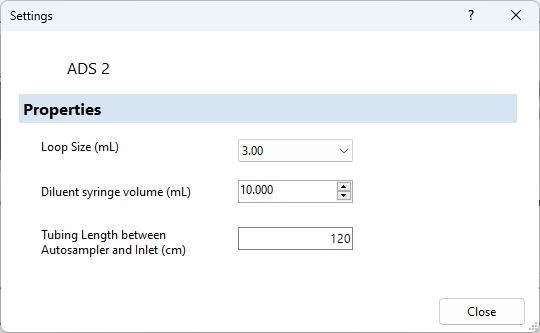
From the context menu of [ADS 2], click [Properties].
Enter the [Loop Size], [Diluent syringe volume], and [Tubing Length between Autosampler and Inlet] and click [Close].
Start acquisition
Turn on the plasma.
Set the acquisition method on the Setup pane, Tune modes pane, and Element Selection pane.
From the Task Navigator, click [Sample Introduction].
The Sample Introduction pane is displayed.Select [Autodilution] as the [Sample Introduction].
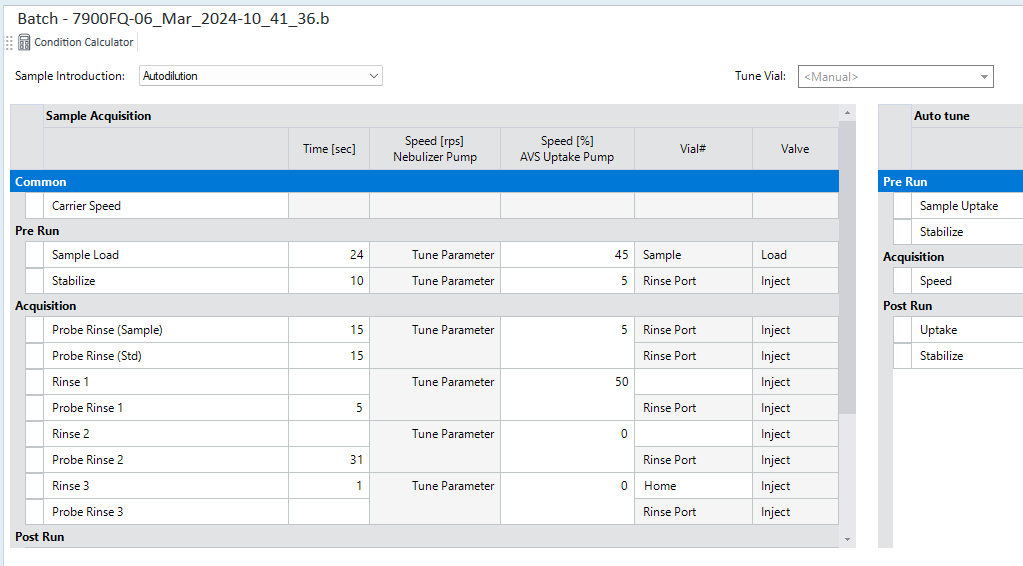
Click [Condition Calculator] from the toolbar.
The [Condition Calculator] dialog box is displayed.
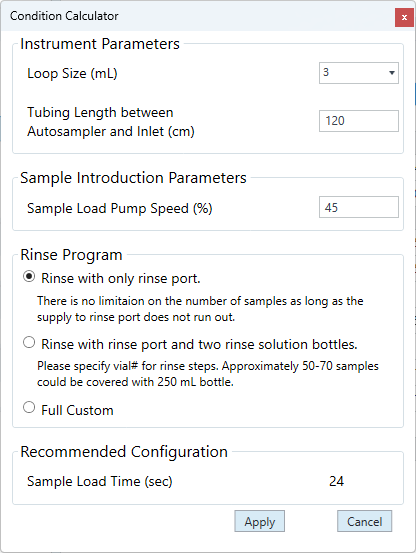
Enter each item and click [Apply].
The sample introduction parameters on the Sample Introduction pane are updated.From the Task Navigator, click [Calibration].
The Calibration pane is displayed.If you are not using the Autocalibration Assistant, set the calibration parameters as usual.
To use the Autocalibration Assistant, proceed as follows.From the toolbar on the Calibration pane, click [Autocalibration Assistant].
The [Autocalibration Assistant] dialog box is displayed.
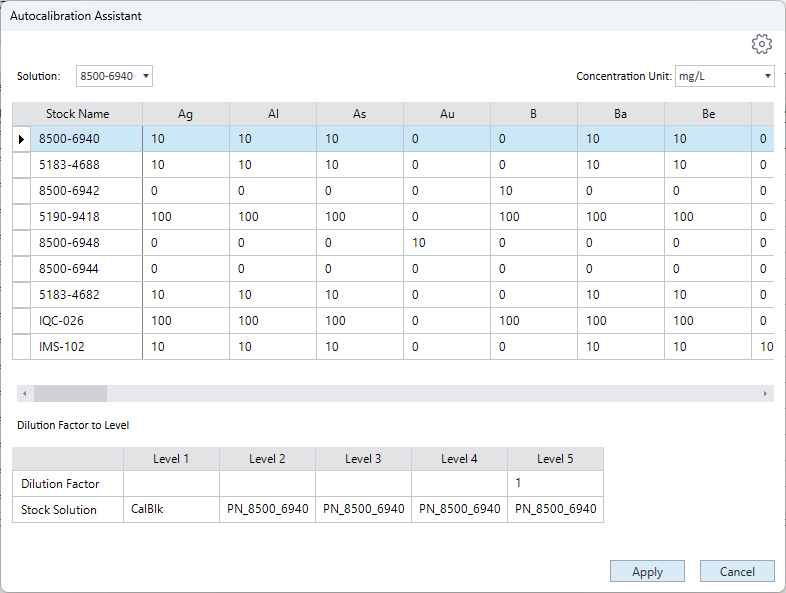
Select a stock solution.
If necessary, click in the upper right corner
to create and select a new stock solution.
in the upper right corner
to create and select a new stock solution.Enter the dilution factor for each level.

Click [Apply].
From the Task Navigator, click [Sample List].
The Sample List pane (sequence) is displayed.Set as follows depending on how you want to perform Autodilution.
When specifying Autodilution in advance on the sample list table
From the sample list table context menu, click [Add/Remove] and add the [Autodilution] column.
Enter the dilution factor for each sample in the [Autodilution] column.
When performing Autodilution as an error action in standard QC
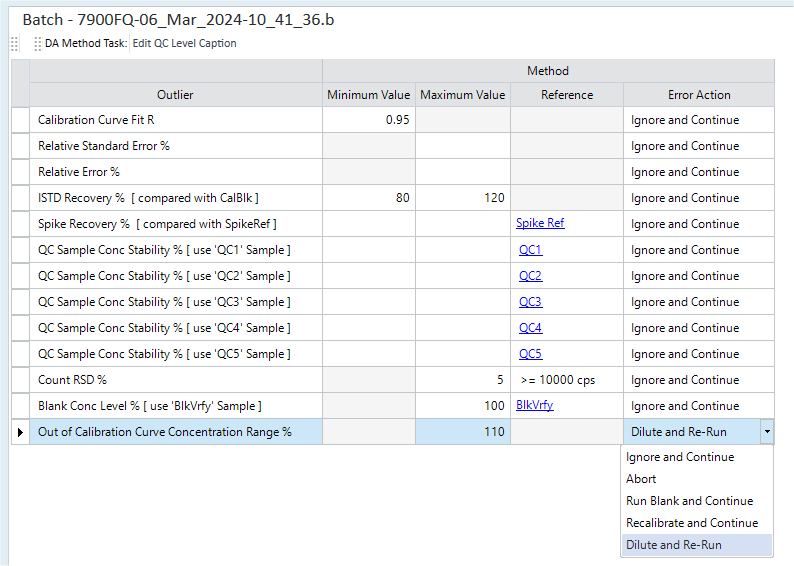
From the Task Navigator, click [QC].
The FullQuant Outlier Pane is displayed.Select [Dilute and Re-Run] as the [Error Action] for [Out of Calibration Curve Concentration Range %].
To determine errors only for specific elements, perform the following operations. If these are not executed, errors will be determined for all elements.
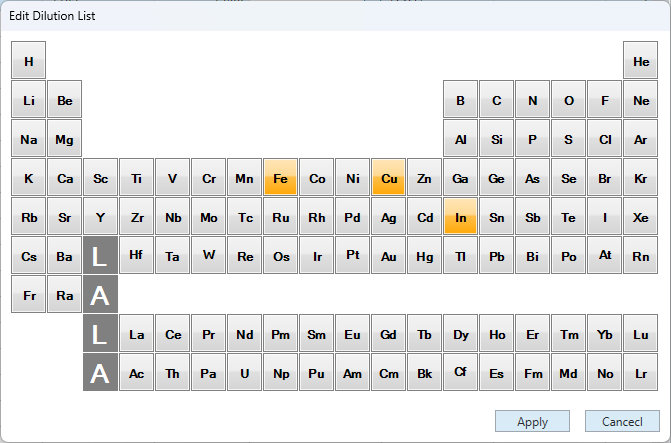
Add the [Dilution List] column to the sample list table on Sample List Pane (Sequence).
Click the right side of the [Dilution List] column to display the [Edit Dilution List] dialog box. From the periodic table, click the elements for which you want to determine errors, and click [Apply].
When performing Autodilution as the error action in Intelligent Sequence Software
- Select the [Intelligent Sequence] check box under [Data analysis method] on the Setup pane.
- Make the necessary settings in the Intelligent Sequence software
and select [Dilute and Re-Run] as the [Error Action] on
the QC Parameters
pane. For details, refer to the "Intelligent Sequence
Software " manual.
If you want to perform error judgment only for the specific elements, set the [Dilution List] column in the same way as c. d. for standard QC.
From the Task Navigator, click [Dashboard], and from the context menu of [ADS 2] on the Dashboard pane, click [Flush] to flush the ADS 2 three times. Do this every day at the start of use.
From the Task Navigator, click [Tune Modes] and click [Start Auto Tune] from the toolbar on the Tune Modes pane to perform the batch auto tune.
Click [Add to Queue] in the [Batch] group on the [Home] tab to start a batch acquisition.
If you interrupt a batch acquisition, a message in the status bar may indicate that ADS 2 needs to be primed. In that case, follow the instructions in the message and perform priming before restarting. To perform priming, click [Prime] from the context menu of [ADS 2] on the Dashboard pane.
Review the batch results in the data analysis window.
If necessary, turn on [Autodilution Summary] in the [Batch] group on the [Report] tab to see a quick batch report containing diluted and reacquired results.